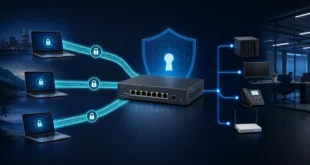
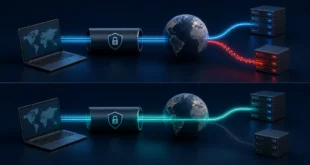
WireGuard is a compact VPN protocol, but a secure result depends on more than importing a configuration and pressing Connect. The routes, DNS resolver, key handling, firewall policy, and server-side peer definition all affect what the tunnel protects. This guide shows a controlled Windows 11 setup that is easy to test and easy to reverse.
What You Need Before You Start
Use the official WireGuard for Windows client and obtain the tunnel configuration through a trusted channel. A typical configuration contains a client private key, client address, DNS resolver, server public key, endpoint, and allowed IP ranges. Treat the private key like a password. Do not paste it into tickets, screenshots, chat rooms, or public configuration repositories.
Decide whether the tunnel should carry all traffic or only selected networks. A full tunnel normally uses 0.0.0.0/0 and, when IPv6 is supported end to end, ::/0. A split tunnel lists only the remote subnets that must be reached. This decision affects privacy, local device access, performance, and troubleshooting.
Install the Windows Client Safely
- Download the Windows installer from the official WireGuard website. Avoid repackaged installers and download portals.
- Install it with an administrator account. The service and virtual network adapter require elevated privileges.
- Open WireGuard and choose Add Tunnel. Import the supplied configuration, or create an empty tunnel if you administer both endpoints.
- Give the tunnel a descriptive name such as
home-vpnoroffice-eu. Do not put a password, hostname that reveals a person, or other secret in the name.
When WireGuard generates a key pair, the private key remains on the client. Only the public key belongs in the server peer configuration. If a private key has been exposed, generate a new pair and remove the old public key from the server.
Review the Tunnel Configuration
A minimal client configuration resembles the following. Replace every example value; documentation addresses are not usable on the public internet.
[Interface]
PrivateKey = CLIENT_PRIVATE_KEY
Address = 10.20.30.2/32
DNS = 10.20.30.1

[Peer]
PublicKey = SERVER_PUBLIC_KEY
Endpoint = vpn.example.net:51820
AllowedIPs = 0.0.0.0/0, ::/0
PersistentKeepalive = 25
AllowedIPs is both a routing instruction and a peer selector. Do not add broad private ranges automatically: they can overlap the network at a hotel, office, or home. For split tunneling, list the smallest remote prefixes you need. PersistentKeepalive is useful for clients behind NAT that must remain reachable, but it is not mandatory for every client.
On the server, create a peer with the client public key and assign only the client’s tunnel address, usually a /32 for IPv4 and a /128 for IPv6. Reusing the same tunnel address or key on multiple devices causes unpredictable routing.
Connect and Validate the Tunnel
Activate the tunnel and check the WireGuard log. A recent handshake and increasing transfer counters show that encrypted packets are moving, but they do not prove that DNS and routes are correct.
- Run
Get-NetIPConfigurationin PowerShell and confirm that the WireGuard adapter has the expected address. - Run
Get-NetRoute -AddressFamily IPv4 | Sort-Object RouteMetricto inspect the active routes. - Test a remote tunnel address with
Test-NetConnection 10.20.30.1. - For a full tunnel, check the public IP in a browser. It should be the VPN exit address.
- Resolve a domain with
Resolve-DnsName example.comand confirm that the intended resolver answers.
If the handshake is missing, check the endpoint hostname, UDP port, server firewall, clock, and keys. If a handshake exists but no resource is reachable, inspect AllowedIPs, server forwarding, return routes, and NAT. Use the method in our Windows latency and packet-loss guide when the tunnel connects but feels unstable.
Prevent DNS and IPv6 Leaks
Set a DNS resolver reachable through the tunnel and ensure its address is included in the routed prefixes. Browser encrypted-DNS settings can bypass the operating-system resolver, so either use a browser policy compatible with the VPN or select a trusted resolver deliberately. Our DNS leak testing guide covers adapter, browser, split-tunnel, and IPv6 checks.
Do not add ::/0 unless the VPN server forwards IPv6 correctly. If the local connection has IPv6 but the VPN does not, decide explicitly whether to disable IPv6 on that tunnel path or provide working IPv6 through the VPN. An untested half-configuration is more dangerous than a documented IPv4-only design.
Apply a Sensible Security Baseline
- Use a separate key pair for every device and remove lost devices immediately.
- Limit server-side peer routes to the addresses assigned to that peer.
- Restrict access with server firewall rules; joining the VPN should not grant access to every internal host.
- Keep Windows, WireGuard, and the VPN server updated.
- Protect the Windows account and disk with strong sign-in controls and BitLocker where appropriate.
- Record the owner, purpose, address, and revocation date for each peer.
WireGuard does not distribute user identities, certificates, or policy by itself. For a team, pair it with a documented provisioning and revocation process rather than treating configuration files as permanent shared secrets.
Rollback and Troubleshooting
Before changing a working tunnel, export a protected copy of the configuration and record the current public IP, routes, and DNS servers. If the new setup breaks connectivity, deactivate the tunnel first. Remove only the new peer or route, restore the known-good configuration, and retest local internet access before reconnecting.
Common causes include an incorrect server public key, carrier or guest Wi-Fi blocking UDP, an endpoint resolving to an old address, overlapping subnets, or an MTU problem. Test another network and server endpoint before changing many settings at once. For systematic performance isolation, use our slow VPN diagnostic workflow.
Frequently Asked Questions
Should I use a full tunnel or split tunnel?
Use a full tunnel when the goal is to protect all traffic on untrusted networks. Use a split tunnel when only defined private resources should use the VPN and local internet traffic may remain direct. Document the exception because split tunneling changes the security boundary.
Is PersistentKeepalive required?
No. It is mainly useful when a peer behind NAT must keep the mapping active. A value of 25 seconds is common, but leaving it unset reduces unnecessary traffic when the client only initiates connections.
Does a recent handshake mean the VPN is secure?
It confirms that the peers authenticated and exchanged encrypted traffic recently. You must still verify routes, DNS, firewall restrictions, public IP, and access boundaries.
Final Check
A safe Windows 11 WireGuard deployment has unique device keys, precise peer addresses, intentional routes, a tunnel-aware DNS resolver, restricted server access, and a tested revocation path. Save the validation results with the configuration date. That small operational record turns a working tunnel into a maintainable security control.