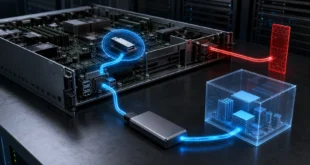
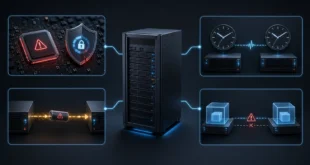
To make a complete disk clone, boot Clonezilla from separate media, connect an external USB SSD at least as large as the internal source disk, choose device-device, and copy the internal disk to the external disk. The target is overwritten. The most important step is identifying source and destination by model, capacity, and connection—not by a drive letter remembered from Windows.
A USB flash drive can technically be a target when large enough, but a USB SSD is normally faster, more durable, and more reliable for a full system clone.
Clone Versus Image
Clonezilla offers two different workflows:
- device-device copies one disk directly to another. The USB target becomes a disk clone and may be bootable on compatible hardware.
- device-image stores compressed image files inside a folder on an external drive. It is better for keeping several dated backups, but the files are not a directly bootable copy.
The steps below use direct disk-to-disk cloning. If the goal is a reusable backup archive rather than an immediately substitutable disk, choose device-image instead.
Prepare Without Guessing
You need a separate Clonezilla boot USB and a second external device as the clone target. Disconnect unrelated external disks to reduce the chance of selecting the wrong one. Record the internal disk’s model and exact capacity before rebooting.
The destination should be equal to or larger than the entire source disk, not merely larger than its used files. Cloning to a smaller device can require filesystem shrinking and expert options; it is not a safe quick procedure.
Back up irreplaceable files independently. A clone operation protects against some failures, but selecting the disks in reverse destroys the original.
Direct Clone: Internal Disk to USB
The official Clonezilla disk-to-disk guide uses this flow:
- Boot the PC from the separate Clonezilla Live device.
- Choose the normal Clonezilla Live entry, language, and keyboard layout.
- Select Start Clonezilla.
- Select device-device — work directly from a disk or partition to a disk or partition.
- Select Beginner mode for a normal same-size or larger clone.
- Select disk_to_local_disk — local disk to local disk clone.
- Choose the internal system disk as the source.
- Choose the external USB SSD as the target.
- Accept the filesystem check or repair choice appropriate to the disk’s known condition; do not use repair options as a substitute for a backup.
- Read the final summary and confirm only when model and capacity prove the direction is correct.
Clonezilla asks for confirmation more than once because the target partition table and data will be replaced. Stop if the displayed source or target is unexpected.
Use the Larger Target Space
By default, a clone can reproduce the original partition sizes and leave extra capacity unallocated on a larger target. Clonezilla documents the -k1 option for proportionally creating the partition table and -r for resizing supported filesystems during applicable workflows.
Beginners can leave the extra space unallocated and expand a partition later with a supported partitioning tool. Expert resize options should be used only with a verified backup and a filesystem Clonezilla can resize safely.
Do not use -icds casually to bypass destination-size checks. The official documentation warns that this smaller-target path requires knowing that all data and partition geometry can fit.
Verify the Clone
After completion, shut down rather than immediately booting with both copies attached. Disconnect the original internal disk if practical, connect the clone through a boot-capable interface, and perform a controlled boot test. Two disks with duplicate filesystem or boot identifiers can confuse firmware or the operating system.
If the USB clone is intended only for disaster recovery, verify that Clonezilla completed without errors, record the source and target models, date the clone, and periodically repeat a restore test on spare hardware. A backup that has never been restored is unproven.
Windows BitLocker, device encryption, hibernation, RAID metadata, and vendor recovery layouts can affect portability. Save recovery keys separately and confirm whether the storage controller and boot mode are available on the recovery system.
Restore the USB Clone to the PC
Restoring a direct clone is the same destructive operation with the direction reversed:
- Connect the USB clone and the internal replacement disk.
- Boot from the separate Clonezilla Live media.
- Choose device-device, Beginner, then disk_to_local_disk.
- Select the external USB clone as the source.
- Select the internal PC disk as the target.
- Verify models and capacities at every confirmation.
- Complete the clone, shut down, and disconnect the external source before the first normal boot.
The target internal disk is erased. If it contains any newer files, copy them elsewhere before restoring.
When the Restored System Does Not Boot
Check firmware boot mode first: a UEFI/GPT installation should normally boot in UEFI mode, while an older BIOS/MBR installation may depend on legacy compatibility. Confirm that the correct disk is first in the boot order and that the clone contains the expected EFI System Partition or boot partition.
If the disk was moved to substantially different hardware, storage drivers, activation, encryption, or boot policy may prevent startup even though the data copied correctly. Use the operating system’s supported recovery tools; do not repeat the clone in the opposite direction until the only good copy is clearly identified.
Clonezilla makes the copying step straightforward. Safety comes from separate boot media, an adequately sized target, disconnected unrelated disks, exact hardware identification, and a tested restore plan.