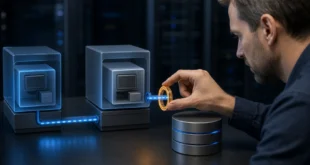
A virtual machine that depends on a physical USB license dongle can be cloned, but the clone must not start with an ambiguous claim on the same device. Treat the USB assignment, the virtual USB controller, and the virtual disks as separate configuration elements.
An error mentioning hbr_filter missing required option: gid is a fourth, unrelated element: stale vSphere Replication metadata. Removing USB settings will not repair that filter, and removing an HBR filter will not make a dongle available to two VMs.
Inventory the Source Before Cloning
Record the source VM’s:
- guest operating system and virtual hardware version;
- CPU, memory, firmware, controllers, networks, and virtual disks;
- virtual USB controller type;
- each Host USB Device assignment;
- whether the USB device is enabled for vMotion;
- snapshots, backup state, and vSphere Replication state;
- application procedure for releasing the dongle.
Broadcom’s USB passthrough procedure confirms that the physical device must be connected to the relevant ESXi host and cannot be added to another VM until the first VM releases it.
Do not copy credentials, internal addresses, license keys, serial numbers, or recovery notes from the VM annotation into documentation or a public article. VM annotations are part of configuration data and can be exposed in exports and support bundles.
Detach the Physical USB Device Before the Clone
For the cleanest workflow:
- Stop the application that uses the dongle.
- Shut down the guest cleanly.
- Confirm the VM is Powered Off, not suspended.
- Open Edit Settings.
- Detach the passthrough device from the source VM before cloning.
- Keep the virtual USB controller unless the clone does not need any USB functionality.
- Clone the powered-off VM.
Removing the host device mapping is not the same as removing the USB controller. The controller is virtual hardware; the host device entry binds a specific physical device to the VM. Broadcom’s controller-removal guidance warns that removing a controller eliminates USB passthrough and may affect guest input-device support.
If the source must retain the dongle after cloning, add the physical device back to the source only. If the clone will replace the source, leave the source powered off, add the dongle to the clone, and validate the application. Never power on both with the expectation that one physical dongle will be shared.
Inspect the Clone Before First Power-On
Confirm that the clone points to its own VMDKs and has an appropriate MAC/address policy. Review its USB entries and verify no physical host device remains unexpectedly attached.
Do not edit the .vmx first just because the VM had USB passthrough. Try the supported vSphere settings workflow and read the exact power-on error. USB-related failures name a USB controller or device; storage-filter failures name the virtual disk and filter.
Recognise the Separate HBR Filter Failure
A clone or restored VM can fail with:
Failed to attach filter 'hbr_filter' to nvme0:0
hbr_filter missing required option: gid
That message points to vSphere Host-Based Replication metadata associated with the virtual disk. A configuration can contain entries resembling:
nvme0:0.filters = "hbr_filter"
nvme0:0.hbr_filter.rdid = "RDID-..."
nvme0:0.hbr_filter.persistent = "hbr-persistent-state-....psf"
Broadcom now documents a known clone limitation in which HBR filters are not removed correctly during cloning. It also documents the same symptom for restored VMs, where the .vmx retains replication metadata but the required group or state files are absent.
Do not delete a VMDK, change the virtual disk filename, or remove USB configuration to address this error. First determine whether the source is still protected by vSphere Replication and whether the clone was created through a supported workflow.
The safest supported recovery is to recreate the VM configuration and attach the existing VMDK, following the current Broadcom KB and preserving controller type and disk order. A narrowly controlled .vmx cleanup may be used only with a powered-off VM, a verified backup, and full knowledge of the replication state. Never remove HBR metadata from an actively replicated source VM merely to make a clone start.
A Controlled .vmx Inspection
When vendor support or a documented recovery procedure requires inspection:
- Leave the affected clone powered off.
- Resolve its current VM ID and datastore path; never reuse an ID from an earlier VM.
- back up the
.vmxin the same directory with a timestamp; - search for
hbr_filter,usb, and the disk controller name; - change only entries authorised by the recovery procedure;
- reload the VM configuration;
- verify the disk chain before power-on.
Do not publish the .vmx unredacted. It can contain MAC addresses, UUIDs, datastore paths, device serials, internal networks, and administrator notes.
Reconnect the Dongle to the Intended VM
After the clone starts without the physical device:
- shut it down if the application or guest does not support safe USB hot-add;
- add the appropriate virtual USB controller if absent;
- add Host USB Device and select the exact dongle;
- leave vMotion support disabled unless the infrastructure and device require it;
- start the VM and verify the device in the guest;
- confirm the licensed application works after a full guest reboot.
Also test host restart and ESXi maintenance procedures. A USB-dependent VM has a physical placement constraint that DRS, HA, backup, and disaster-recovery documentation must reflect.
The reliable method is deliberately uneventful: release the dongle, clone the powered-off VM, validate storage and replication metadata, then assign the physical USB device to exactly one final VM. Keeping these layers separate prevents a USB workaround from masking a disk-filter problem.